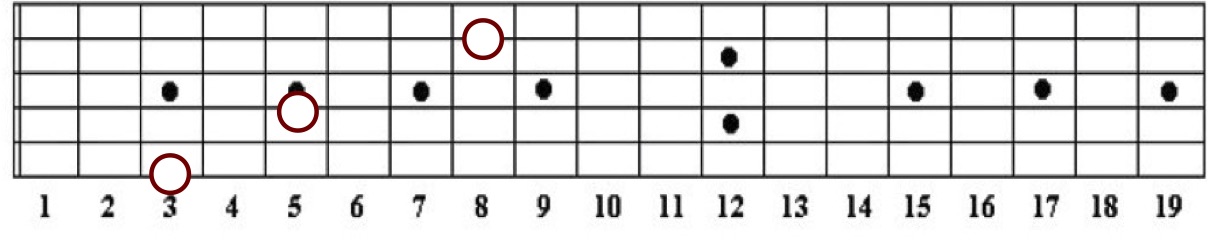
This is a follow up to my “Know Not Memorize Your Fretboard | Steps” video lesson. In that video I talk about using the dots to learn the 6th and 5th string to learn half of the notes on the guitar neck (6th and 1st string are both E, so once you know the 6th, you know the 1st too!).
How about the rest? Octaves.
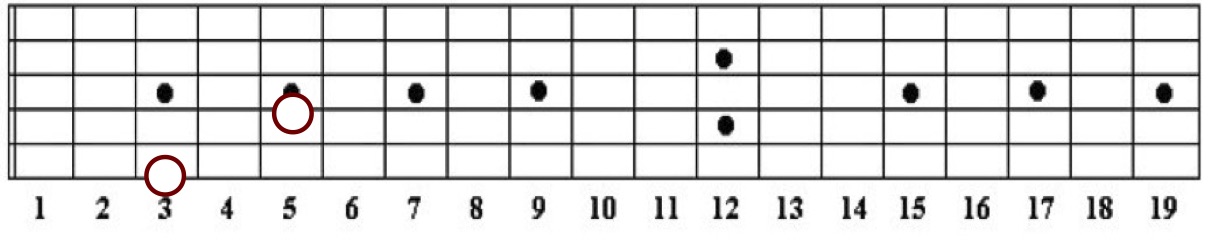
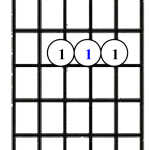
Yes, octave patterns. Octave patterns are the way to learn the rest of the fretboard. Imagine drawing a line from a string you know (6th String), up two strings (4th String) and up two frets:
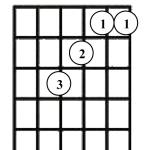
Now, utilizing it is key here. Sitting down and treating it like a history test of only dates is not going to sink in. A good way to use it is by plugging in our “F” shapes. Yes, that F chord you learned as a beginner. Use only that shape to play all sorts of chord progressions, playing only that one shape sliding all over the fretboard.
Chord Progressions PDF
Backing Tracks
How about the third string? Let’s use the same octave shape but this time from our 5th string to 3rd string. Again, the point of this is to immediately revert back to something we know; the 5th string! So when searching for something on that 3rd string, draw a mental line back two frets, and up to the 5th string.

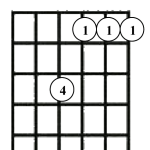
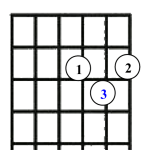
A good way to utilize this is going to be Triads with a 3rd string root:
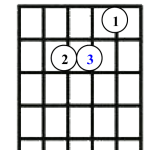
These are two that immediately come to mind (although not the only ones), as these are just the middle section of our 5th string barre chords (something we used to learn the 5th string).
Again, throw those into Chord Progressions and Backing Tracks. Stick to just the 3rd string triads… all over the fretboard. These are not meant to be the most economical (closest) ways to play them, rather they’re meant to let the 3rd string notes sink in.
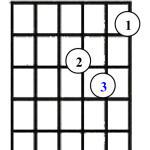
2nd String? This one is definitely the hardest, but not impossible. This is going to be just like the rest, octave patterns, drawing a line to something we already know. Now, if you’re feeling confident about the 4th string root, you can just draw that mental line back to the 4th string. If you are feeling less confident, go back two octaves!

What “Chord Shape” can we use to start utilizing the second string?! Our “D” and “Dm” shape. Again, throw those over Chord Progressions and Backing Tracks.
Between Octaves, and a steady diet of utilizing and focusing on one string at a time, the fretboard will become less illusive and more clear. It’s imperitive to actually utilize it and not just sit there counting fret by fret. If you look at it, the imaginery line we draw, and even the chord shapes we use, for the 6th and 4th string are related. Same goes with the 5th and 3rd string. Once we get that line visualized, the rest should come… with maybe a bigger hurdle for that 2nd string.
Another important note is that the “Note System” is the same regardless of what string your on. After each note is that same note sharped, before each note is the same note flatted, nothing between B-C and E-F. It’s just that each string has a different starting point (what we tune the string too), but once we see that the order of the notes don’t change, just our starting point, it’ll help declutter the fretboard.
Triads are also a great tool to have, especially in a band context. A full barre chord is big sounding, little chords can allow a part of a song move or leave room for the keyboard or bass player to have bigger roles.
Dig.